17 January 2016

Motor Mounts & Moldy Carpets

Today was another productive day that consisted largely of progress towards our motor mount fabrication. Right off the bat when we arrived, it was back to work wrapping up some of the cutting and grinding that we hadn't quite completed yesterday. Immediately after we'd caught up, we were faced with many more metal pieces that needed to be cut out, ground down, and shipped off to Adam's post at the welding table so we could get all the necessary brackets created as soon as possible. For these tasks, Alex and Max did most of the cutting, while North and I worked on grinding down the edges so all pieces were precise and identical, and had no rough edges.


After each piece had gone through its first 2 steps towards completion, they were collected by Adam, who welded them together according to our designs for the mounts. Because the welding process creates extruding beads along each edge of the pieces, they must all return to the grinder after being welded so they can be in accordance with the exact measurements necessary for the mounts.


After this process had been done on each bracket, we had a collection of pieces ready for application into the car. Though not all pieces have been completed as of now, it is certainly satisfying to see the product of our progress and effort.
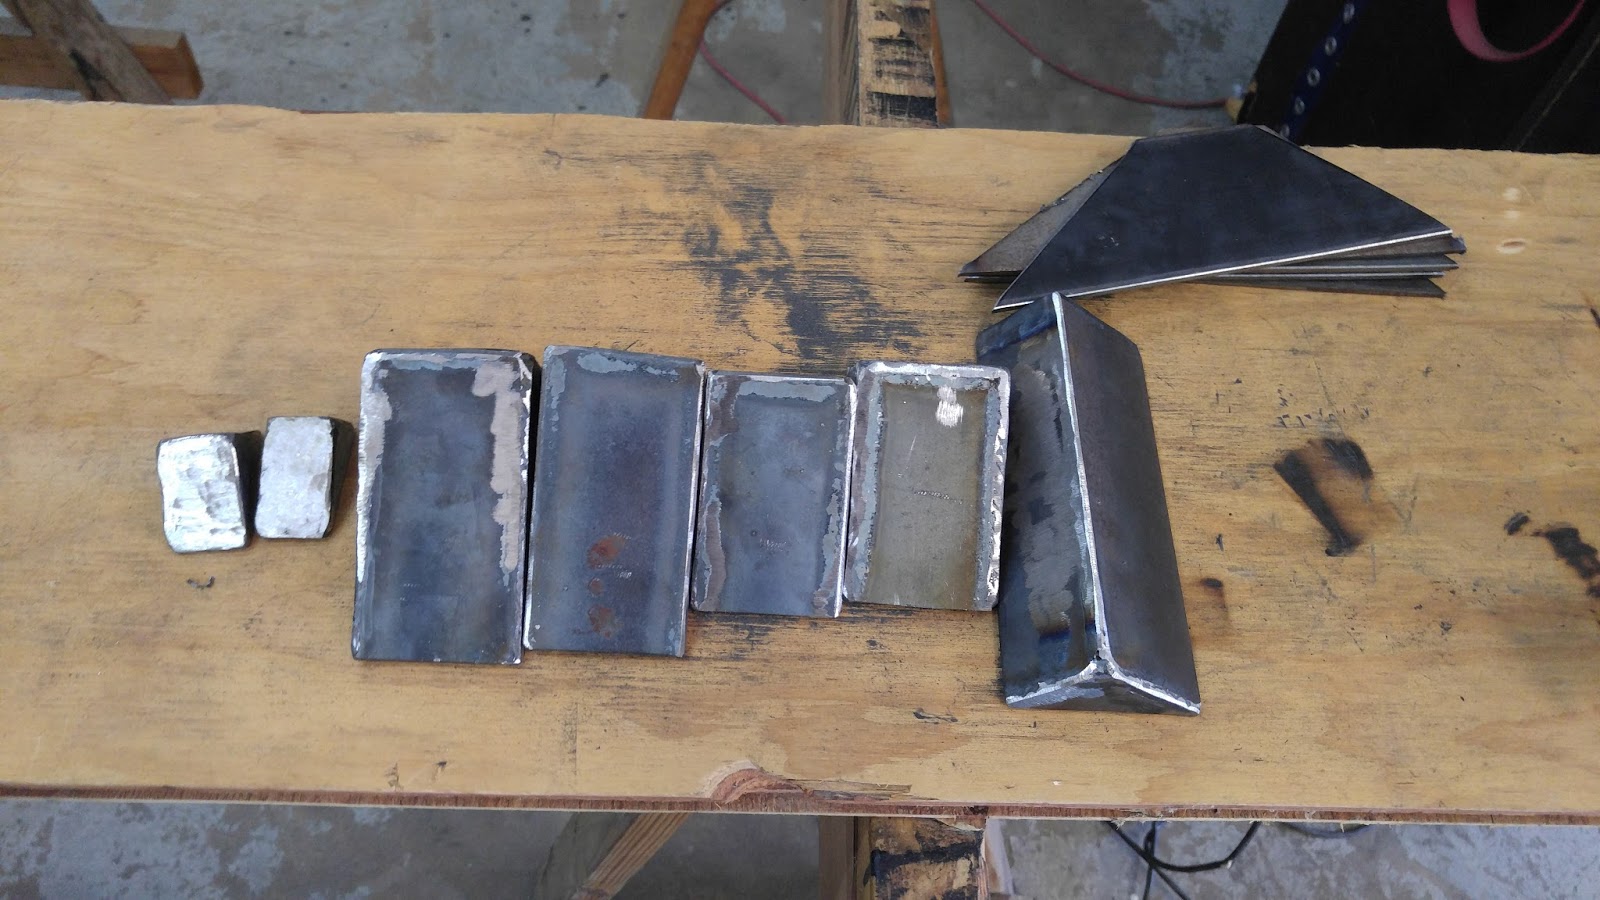
Some of the completed pieces for our motor mounts

The second project we worked on today was the interior carpets of the car. This has been a known issue for a decent amount of time, but North, Julian, and I finally decided to tackle it today. We took the carpet out to the side of the building, powered up the pressure washer, and used extensive amounts of the "Purple Power" spray to clean off the mistreated mats. After letting the carpet air-dry in the sun for most of the day, it is certainly not like new, but it is already looking much better than when we pulled it out, and our work is not done yet.
The interior carpet hanging out to dry after being cleaned

The final task we took on today was beginning to remove the blue tint on the back window that the group had realized earlier was almost impossible to see out of from within the car. In order to do this, North and I sat in the trunk of the car and used razors to slowly remove the blue plastic. After we'd removed most of the surface area of the tint, we used the same "Purple Power" spray from before to get off the glue and other surface scratches from the inside of the window. There is still some more plastic to remove around the edges of the window, but we have high hopes for how it will look when everything is done with.

14 January 2016

Cutting, Welding, and Mounting

Today was yet another productive day for the EV J-term. We started the day off with some welding and cutting pieces for the mounts. Alex and Max got some hands-on experience with the mig-welder, and I got to say that I personally wasn’t up for even trying. It requires some serious skill to do it perfectly. You have to be able to maintain a straight line with consistent pressure, which isn’t easy to do wearing a welding mask. That being said Max and Alex did start to get better at it with some practice.


            Meanwhile, the rest of the group was busy cutting steel for the mounts and grinding it out to have solid pieces with clean edges. I personally found cleaning the edges off easier than cutting a full piece. I say that because it was a little bit of challenge for me to maintain a straight line while cutting the steel.


            After lunch we picked up the battery box that we had sent for fabrication earlier this week. I was sure that Alex and I had the measurements and the design right when we sent it for fabrication, but I was still a little nervous. To test it out we placed it in the trunk and checked if it was within the parameters created by the frame of the car. I breathed a sigh of relief when the box was perfect for the amount of space we had. Then we moved to cutting the steel plate in the trunk off so we could drop the box in. Following that we gathered around the car to discuss which way would be the best to mount the box onto the car. We all had different ideas that worked, but we wanted to go with what would work best, not just easy or fast. So we decided to do several mounts to the frame of the car to make it as strong as possible. This led to our following task which was cutting and welding the mounts.


            Overall we all feel like this J-Term is headed in the right direction. We are making good progress and are on schedule to have the car running by the end of A-Term.

13 January 2016

Inserting the motors

Thursday, January 12th, 2016

    Today, we started off by attempting to insert the electric motors in without them being connected to anything so that we could see what the motors would look like once we added them into the car. We also had to decide how far back to put the motors. We could have them farther towards the front of the car, which would give the car better weight distribution, show off the engine, give the car better handling, and would mean the car would be more structurally stable.
 If we put the engine in the middle, we would have more space in the hood, but the interior would have to be disassembled so that we could put sheet metal on the floor of the car so that the car will be more stable. We would also have to insert support beams and mounts that are not currently there. 
    We decided to place the motors further towards the front of the car, where the gas engine originally was.

 
    This is what the motors will basically look like when they are finally inserted into the car.

We decided to then spend the rest of the day designing the mounts that will hold the new electric motors. The mounts will hold the motor to the frame of the car. The problem is that the old motor mounts will not work with our motors, so we will have to design new mounts to attach to the bottom of the car.
    We designed the mounts for the very front part of the car which will attach to the end of the black motor that is the farthest away from the red motor. 

    
This is the design for the front motor mount, looking from the back of the car to the front of the car. The mount has to attach to the frame of the car, but the issue is that there is no mount that we could weld the new mount to, so the new mount will have to be attached to the chassis of the car.
    Designing a new mount is very complicated, because the mount has to be custom built, which means that there is no pre made design that is guaranteed to work. So if the mounts are too weak, they could collapse and then the motors would put very high amounts of stress on the other mounts, which would mean that they could break as well. But the mounts that we have created are very strong and are made of very strong metals.

  
    This is a picture of another mount design meant to go either in the middle of the two motors or at the end of them. It is very similar because of the shape of the engine bay requires the mounts to take on a similar form.

I feel like we made a lot of progress today and I feel like we took a big step towards converting the car.

11 January 2016

The gas tank is gone!


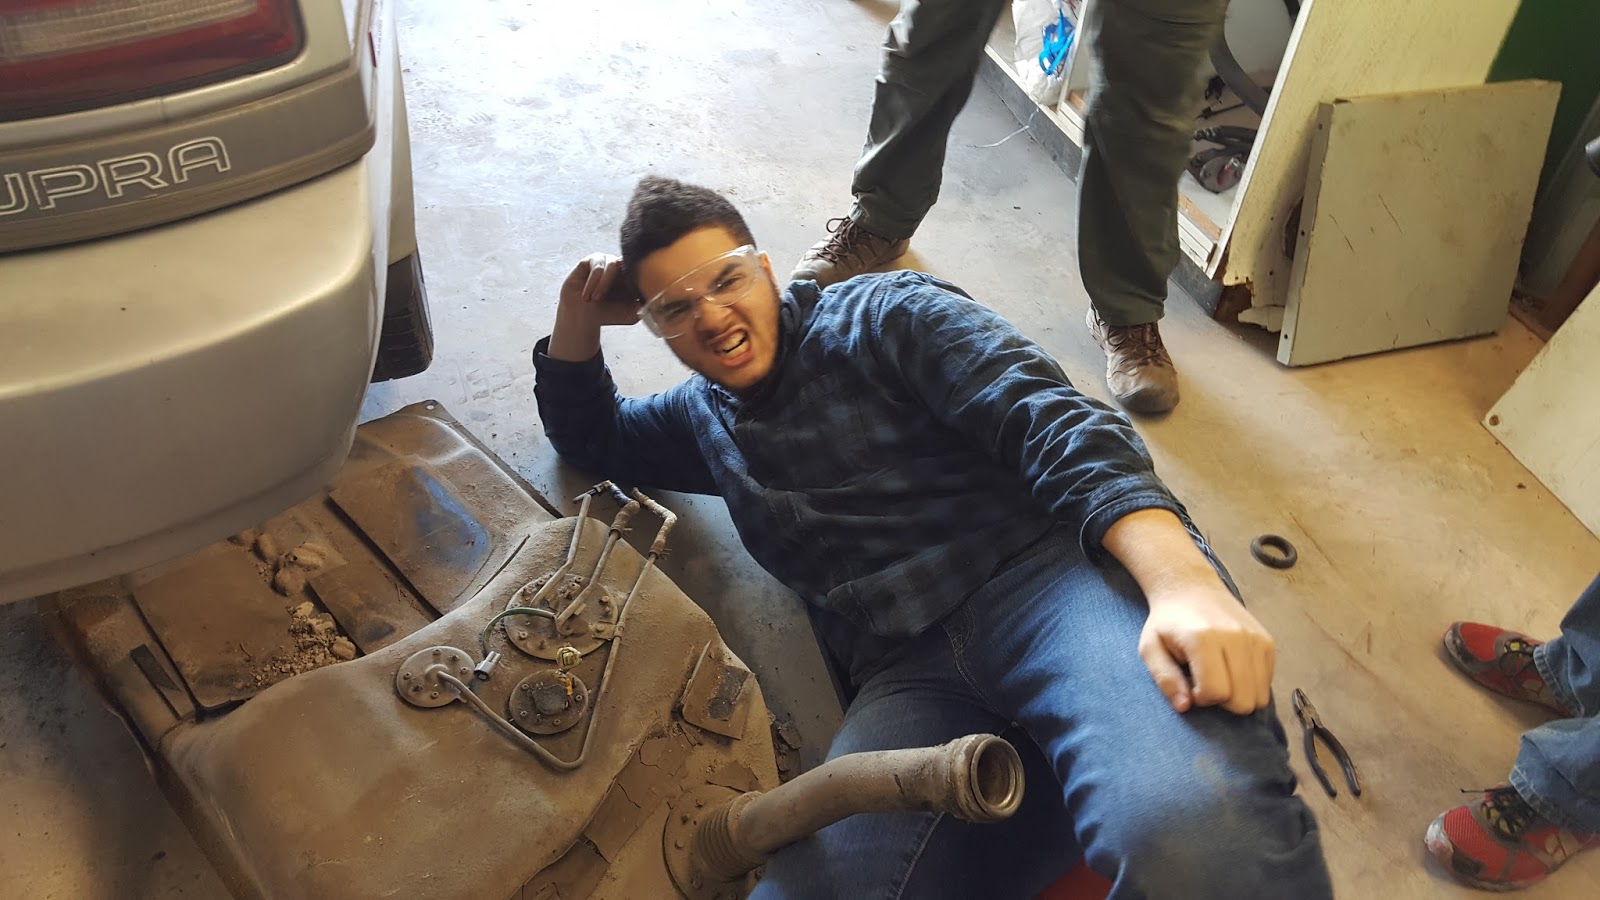
Today we embarked on the task to remove the gas tank from the supra. It was the BIG event for the day. We assisted Adam in removing the mounts connecting the gas tank to the supra. A bunch of gas spilled out of the fuel lines following the removal. But we successfully removed this large part of the car.
Gas tank being removed

Following the successful removal, the group started doing some design for the future stages of the car. We designed and sketched where the battery box will go under the trunk. We knew the number of batteries needed and the dimensions of the batteries, so that we could find the dimensions and right placement for it on the supra. The best way we could do this was making two cardboard mock up (one of the box and one of the trunk) so we had sort of an idea of size and design, which was the smart idea and pretty cool since it is a huge part of the transformation to an electric car. Although the mock up take time, especially when cardboard gets wet (for future notice, don't cut cardboard when it is wet), it was the right direction for this design decision. 

Before today we had been considering options for batteries and placement. But I am glad we were able to know what batteries we are going to be using. Then after knowing that, we decided to place it in the spare tire area, where we will make a hole through and use this as the battery box. The mock up of the entire trunk and of the battery box helped with the design process for the group. Having the decision made for the battery box was a relief, now we just have to execute this step successfully.

Moving to another part of the car, we started working on the motors. We utilized the couple (connects shaft of motors together) and the connecting motor mount from a build that Adam had previously done. There were a lot of really big bolts that go into it, so it took time for it to all come together. Overall, I think we had a successful day and we will be back at it tomorrow. 

10 January 2016

Chemicals, Calvin Harris, and Life Decisions

The team reached a major milestone today when we removed the Supra’s engine with Adam Clark and Calvin Harris. I can say that we were all shocked by the amount of fluid that leaked from the engine. Nearly all of the floor was covered in some sort of grease, ranging from bright red power steering fluid to clear brake fluid. The chemical spill reminded us of just one of the many reasons to goelectric.
The next task was to clean out the engine bay and engine. We rolled the car and engine hoist out of the shop into an open area with the power washer. Getting the car outside came with several difficulties. On our first attempt, the drive shaft of the car started scraping on the ground, so we tied straps from the drive shaft over the top of the car. Unfortunately, this meant the doors of the car would be completely strapped tight as well. Several more creative attempts failed, including one where a person sat in the empty engine bay and held the shaft up with a broom, so we eventually had to saw off a piece or two from the car. Once the car got moving, it started leaking yellow fluid, so we had to stem the flows.
In the parking lot, Calvin gave us a demo for the power washing equipment and we got to work blasting the sludge out of the transmission bay. After power-washing the car, Adam gave us a quick pop-quiz on pieces of the pulled motor. We reviewed which parts of the engine could and could not get water in them; for example, the oil reservoir cannot have water in it, but the water pump (engine cooling) can. Next, we took several pictures of our engine so we could post a listing on Craigslist. Our plan is to post a listing for each part of the engine as well as a listing for the entire engine itself, so we can have it sold as quickly as possible. Based on other listings and a local Supra enthusiast, We expect to sell it between $750 and $1,500. To conclude the morning, we power-washed the garage and organized some tools.
In the afternoon, we learned and practiced how to use a tap and die set. These tools help clean holes for bolts and also form threads. I am sure this skill set will be invaluable once we start fabricating pieces for our electric build. To end the day we had three important discussions on the direction of our car. Our first discussion concerned the location of the electric motor. This will likely be one of our biggest decisions to date, and we have several good options. I think we will likely place the motor in the front of the engine bay for display and maintenance purposes. If we do this, we will need a custom drive shaft, which will be expensive, but we would not have to add a steel bottom to the Supra since there are existing load bearing structures in the engine bay. The next discussion was about battery chemistry and number. This conversation incited our last discussion which was about the future of the EV car and club. Overall, Friday was a very productive day, and I cannot wait to work more on the car.

Note: I have a feeling the car, and blog, will get a name very soon.

07 January 2016

Obstacle #1

The drive to Humble today was full of excitement because the plan for the day was to remove the engine. Upon our arrival, Adam gave us a quick lesson on the parts of a conventional gasoline engine. It was vital that we got this lesson because we needed to know what exactly we needed to take out and how. We weren’t really sure how difficult it would be to remove the engine, but quickly discovered that it is no easy task. Our first plan of attack was dividing the work between us and have each of us take something out.

One of the big hurdles we faced was figuring out what nuts and bolts held what in place, as we wanted to be as efficient as possible. The car being manufactured in 1990, the engine bay was pretty rusty and many of the nuts and bolts were stuck. So it took some serious effort just to unscrew some of the components.

While half of us were working on the engine bay, the other half was taking apart the back seat of the car. Supra, being a coupe, the rear seats weren’t of any meaningful use. So we decided to use that space and the now empty spare tire well for batteries. The extra space in the back and the engine bay will give us sufficient room for batteries.  


The day was coming to an end and we still weren’t able to get the engine out. We used an engine hoist to pull out the engine, but there was still something holding it down. To rectify that we started looking at the car from underneath it to figure out what exactly was going on. We made sure that the transmission was completely disconnected from the engine bay, however the engine still refused to budge. Second we completely disconnected the exhaust system, yet there was still something holding it down. We had to leave soon but emotion was running high as we all were making our effort to find out what the cause maybe. We did make some progress but unfortunately we ran out of time. That being said we are super excited to tackle this problem tomorrow and remove the engine.


06 January 2016

We're Back Baby

Today, in Humble, Texas, the beginnings of our electric vehicle conversion began. I think I can speak for the whole group in saying that we have not been this excited about our electric car since the inception of the project in January 2014. We started some real learning today about what is going to be going on in our car when it's driving.

Adam, one of our mentors for the J term, led us through putting together a DC motor. After that, we put a few together ourselves, and we were all surprised at the weight of the pieces but very appreciative that there's only four parts to the motor. The motor was made up of the thick steel housing with coils strapped on the inside. One of the ends of the motor was attached with the shaft in a way to let it rotate freely, and the other end had brushes made of carbon that would brush against the commutator, another part attached to the shaft. While this may sound complicated, once you have the motor in your hands and put it together yourself, it all makes sense.


We also finally moved the car out of the elements and into the workshop we will be using to work on the car. Before the end of the day, we had removed the hood and trunk of the car and propped it up on car jacks so that we can easily remove the engine tomorrow. 


Tomorrow I'm really excited to make more headway into the project and strip out the parts of the car that need to be taken out. We should be lifting out the engine tomorrow and doing some more cleaning. 

Another exciting part of the day was seeing how enthusiastic and willing to participate the new members of the group are. Garret and North showed their car knowledge in conversation and jumped right in with volunteering. I can see that the club will be left in good hands with the underclassmen after we graduate.