24 January 2016

The Final Day of the Term

This morning, I expected a day much the same as any other day of J-Term, if not less eventful than usual. However, I was pleasantly surprised to see we had another busy and unique day ahead of us. Upon arriving, we immediately noticed that the Supra was missing from the smaller shop, only to find it sitting atop of Adam and Calvin's newly acquired car lift. As we walked in, we were introduced to a friend of Adam's and fellow EV enthusiast, John. He spoke to us a bit about his background and specific love for Supra's, which explained why he was interested in our project.


After meet-and-greets were over, we began to work towards fitting up the beam for mounting the tailshaft housing. First, we had to clear away the thick protective coating on the underside of the car with a grinder. Next, Adam spot-welded plates on either side of the transmission tunnel where the beam will be connected. This was much easier than it would have been previously, because we had a chance to stand directly under the car with full mobility as opposed to laying on the ground.


Next, in order to patch up a hole that had been created in the surprisingly thin sheet metal when grinding down the coating, we welded another plate to the inside of the car, near the feet of the driver's seat. This was fairly simple to complete because the carpets and seats had been removed from the inside of the car for easy access to the transmission tunnel .


Afterwards, we began to prepare for the end of the term, setting up some storage solutions for the next 2 months. First, we helped move Adam's old stripped down Mustang from the back of the big shop to the smaller shop. Then, we brought over the engine hoist and carried the old 7M engine that was originally in the Supra to the back of the small shop. Finally, we moved everything over so the Supra would have a dedicated space for when Adam wrapped some final tasks up after we left. 

21 January 2016

second to last day

It was another day at Humble today. First we tackled welding the rear mount for the motor. But in order to weld rear mount for the motor, we had to take up the carpet in the front of the car. But to remove the carpet, we had to take the front seats, center console, and some interior paneling. The carpet was pretty disgusting, so we sprayed it down with detergent and power washed it. It was pretty gross when all the dirty water came out it.
After this, Calvin asked me to help Adam in the garage to hand him tools. Adam started to align the mounts to get everything welded. The first thing welded was the bar to support the motor. I had to hold the ground clamp in place, which holds onto the piece being welded. It kind of made me uncomfortable since it didn’t have very thick sleeve on today. Then we looked at where the mount placement will be on the transmission tunnel. We came to the obstacle at this point since there was a hole through the metal on accident. To fix this problem, we are creating plates to cover the hole by basically sandwiching these two plates to cover the hole then welding it onto the frame.
While all this was happening, John, Shiraz, and Alex worked on the lip to go underneath the battery box. It is a frame that goes done less than an inch down. It would have weatherstripping on it. It would then form a seal and be watertight. This was made so that no water got into the battery box from the outside. We finished a lot today and worked on the proposal this afternoon once we got back.

20 January 2016

The Pen is as Powerful as the Grind Wheel


I, Alexander Donnenberg, have made a box. This is not just any box, it's a five sided box made of beautiful steel. Calvin and I spent most of yesterday designing and crafting the box, and this morning was spent on grinding down the outside so that the surface was smooth and still box-like. It was very tedious work but I did not mind because the box was source of great pride and accomplishment. While I may have lost some hearing, it was worth it. The box's purpose is to house the controller from the weather, as complicated and clever electronics generally do not like getting wet or dusty. I made it five sided so that the big side facing outwards will have a plexiglass cover that can be screwed in, giving a great view of the controller. The housing will also have holes in the front and back of the box for the water hoses going into the controller and the terminal connections going out to the motors. In other news, the greatest milestone of our project was reached today. The battery box was completely and successfully installed. This was one of our two goals to reach by the end of the J term and we are all so proud that we reached it. But it required some extra motivation to reach today, which we all got from a pep talk in the car back from lunch by Mr. Grisbee. He had noticed a lack of drive from us in the last couple of days, voiced his concerns, and gave us new spirit to find the line to follow again. Here are some pictures that were taken in the afternoon during the completion of the battery box mounting.


19 January 2016

Slag and Fire


Shiraz and I worked on fabricating pieces of steel to cover exposed areas around the battery box. It was a fairly simple design process that required us to mock up the measurements on cardboard first then trace them onto steel. Soon after, John Long and James Moudry accompanied us to the machinist shop where they observed Joey cut the 1/8th inch steel with plasma torch. I was proud to have the head of school and Mr. Moudry visit Humble, since they have been so supportive of the project. The steel cut outs left an outline of hardened steel called “slag.” Max put in a great amount of effort grinding off the slag, and He also helped change the curve of the fabricated pieces, which took several hours. Meanwhile, Alex was involved in a solo project to design the steel box and mounts for the vehicle’s controller. He and Calvin created the box so that it would not need to be machine cut and folded, but instead, hand built. I was truly impressed considering they were working with very rigid steel. I think this is a testament to the power of the design process and how much work an ingenious design can save you.

Later in the day I was assigned to grind off surface sections of the car frame, so we could get a clean weld for our engine mounts which would provide additional structural support for our motor. I have no difficulty using the power grinder, but I was put off by the idea that I would be on my back under the car using the power tool. Bear in mind these grinders spit jets of sparks.  I remembered something a teacher said on one of the Odyssey trips, “growth comes from leaving your comfort zone.” The advice gave me the motivation I needed to go through with the task.
Throughout the day Adam welded the car mounts we created to the battery box. In the afternoon the welding caught part of the undercoating of the car on fire, but it was quickly extinguished with no harm done. Alex also welded today, in order to reinforce his controller box.


All in all, today was not our busiest day, but a great amount of progress was made on the car, and all of us refined our metal working and design skills.

17 January 2016

Motor Mounts & Moldy Carpets

Today was another productive day that consisted largely of progress towards our motor mount fabrication. Right off the bat when we arrived, it was back to work wrapping up some of the cutting and grinding that we hadn't quite completed yesterday. Immediately after we'd caught up, we were faced with many more metal pieces that needed to be cut out, ground down, and shipped off to Adam's post at the welding table so we could get all the necessary brackets created as soon as possible. For these tasks, Alex and Max did most of the cutting, while North and I worked on grinding down the edges so all pieces were precise and identical, and had no rough edges.


After each piece had gone through its first 2 steps towards completion, they were collected by Adam, who welded them together according to our designs for the mounts. Because the welding process creates extruding beads along each edge of the pieces, they must all return to the grinder after being welded so they can be in accordance with the exact measurements necessary for the mounts.


After this process had been done on each bracket, we had a collection of pieces ready for application into the car. Though not all pieces have been completed as of now, it is certainly satisfying to see the product of our progress and effort.

Some of the completed pieces for our motor mounts

The second project we worked on today was the interior carpets of the car. This has been a known issue for a decent amount of time, but North, Julian, and I finally decided to tackle it today. We took the carpet out to the side of the building, powered up the pressure washer, and used extensive amounts of the "Purple Power" spray to clean off the mistreated mats. After letting the carpet air-dry in the sun for most of the day, it is certainly not like new, but it is already looking much better than when we pulled it out, and our work is not done yet.
The interior carpet hanging out to dry after being cleaned

The final task we took on today was beginning to remove the blue tint on the back window that the group had realized earlier was almost impossible to see out of from within the car. In order to do this, North and I sat in the trunk of the car and used razors to slowly remove the blue plastic. After we'd removed most of the surface area of the tint, we used the same "Purple Power" spray from before to get off the glue and other surface scratches from the inside of the window. There is still some more plastic to remove around the edges of the window, but we have high hopes for how it will look when everything is done with.

14 January 2016

Cutting, Welding, and Mounting

Today was yet another productive day for the EV J-term. We started the day off with some welding and cutting pieces for the mounts. Alex and Max got some hands-on experience with the mig-welder, and I got to say that I personally wasn’t up for even trying. It requires some serious skill to do it perfectly. You have to be able to maintain a straight line with consistent pressure, which isn’t easy to do wearing a welding mask. That being said Max and Alex did start to get better at it with some practice.


            Meanwhile, the rest of the group was busy cutting steel for the mounts and grinding it out to have solid pieces with clean edges. I personally found cleaning the edges off easier than cutting a full piece. I say that because it was a little bit of challenge for me to maintain a straight line while cutting the steel.


            After lunch we picked up the battery box that we had sent for fabrication earlier this week. I was sure that Alex and I had the measurements and the design right when we sent it for fabrication, but I was still a little nervous. To test it out we placed it in the trunk and checked if it was within the parameters created by the frame of the car. I breathed a sigh of relief when the box was perfect for the amount of space we had. Then we moved to cutting the steel plate in the trunk off so we could drop the box in. Following that we gathered around the car to discuss which way would be the best to mount the box onto the car. We all had different ideas that worked, but we wanted to go with what would work best, not just easy or fast. So we decided to do several mounts to the frame of the car to make it as strong as possible. This led to our following task which was cutting and welding the mounts.


            Overall we all feel like this J-Term is headed in the right direction. We are making good progress and are on schedule to have the car running by the end of A-Term.

13 January 2016

Inserting the motors

Thursday, January 12th, 2016

    Today, we started off by attempting to insert the electric motors in without them being connected to anything so that we could see what the motors would look like once we added them into the car. We also had to decide how far back to put the motors. We could have them farther towards the front of the car, which would give the car better weight distribution, show off the engine, give the car better handling, and would mean the car would be more structurally stable.
 If we put the engine in the middle, we would have more space in the hood, but the interior would have to be disassembled so that we could put sheet metal on the floor of the car so that the car will be more stable. We would also have to insert support beams and mounts that are not currently there. 
    We decided to place the motors further towards the front of the car, where the gas engine originally was.

 
    This is what the motors will basically look like when they are finally inserted into the car.

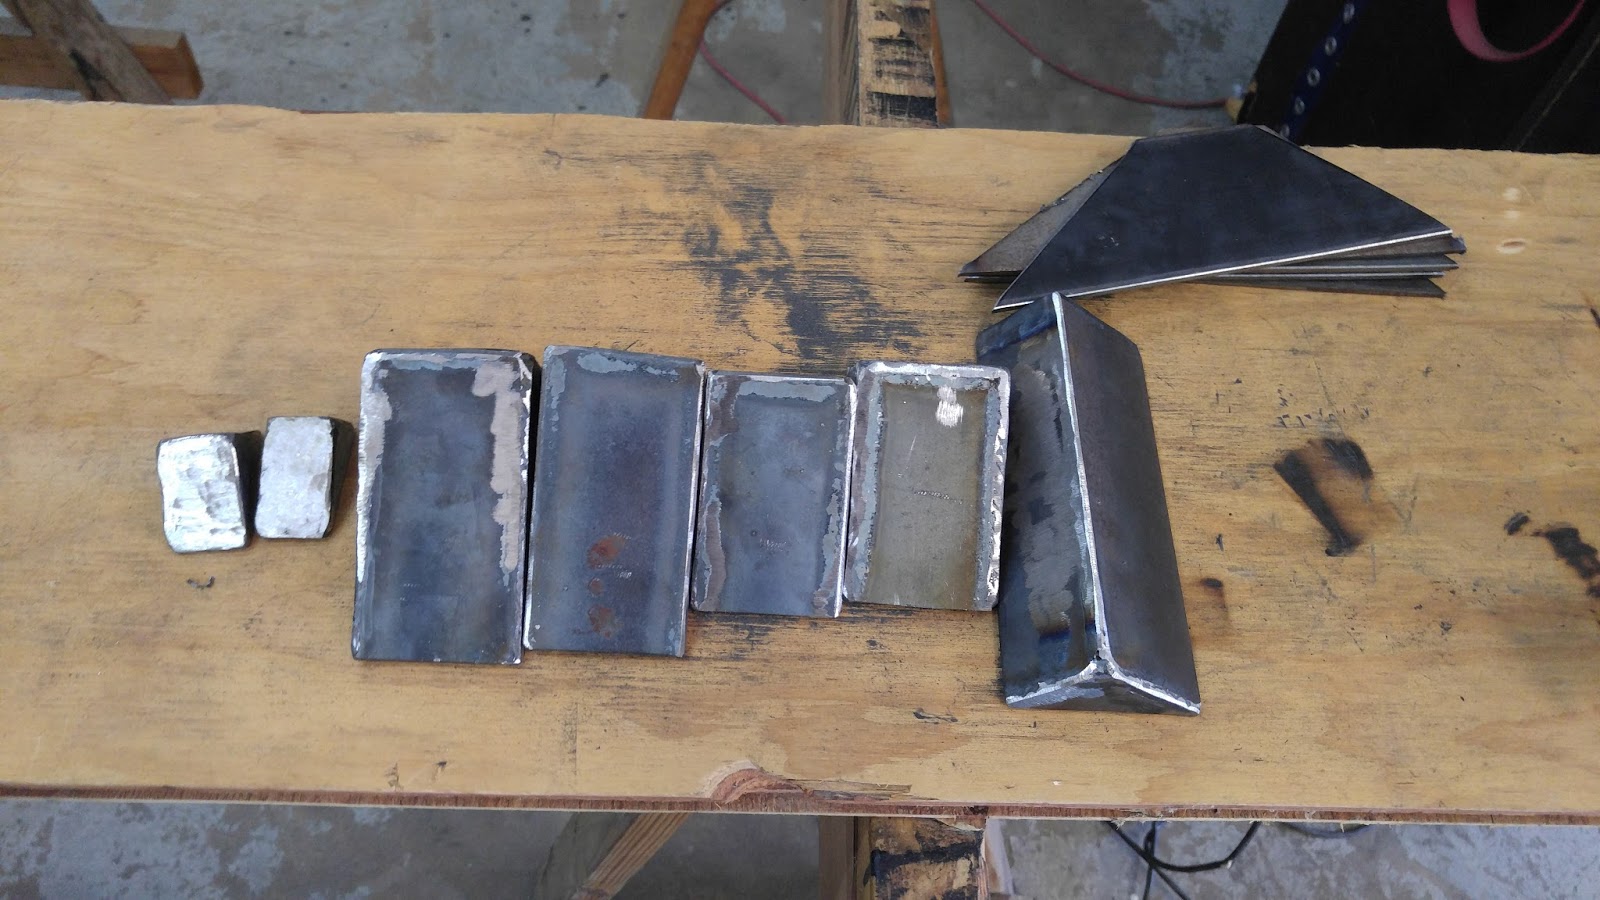
We decided to then spend the rest of the day designing the mounts that will hold the new electric motors. The mounts will hold the motor to the frame of the car. The problem is that the old motor mounts will not work with our motors, so we will have to design new mounts to attach to the bottom of the car.
    We designed the mounts for the very front part of the car which will attach to the end of the black motor that is the farthest away from the red motor. 

    
This is the design for the front motor mount, looking from the back of the car to the front of the car. The mount has to attach to the frame of the car, but the issue is that there is no mount that we could weld the new mount to, so the new mount will have to be attached to the chassis of the car.
    Designing a new mount is very complicated, because the mount has to be custom built, which means that there is no pre made design that is guaranteed to work. So if the mounts are too weak, they could collapse and then the motors would put very high amounts of stress on the other mounts, which would mean that they could break as well. But the mounts that we have created are very strong and are made of very strong metals.

  
    This is a picture of another mount design meant to go either in the middle of the two motors or at the end of them. It is very similar because of the shape of the engine bay requires the mounts to take on a similar form.

I feel like we made a lot of progress today and I feel like we took a big step towards converting the car.

11 January 2016

The gas tank is gone!


Today we embarked on the task to remove the gas tank from the supra. It was the BIG event for the day. We assisted Adam in removing the mounts connecting the gas tank to the supra. A bunch of gas spilled out of the fuel lines following the removal. But we successfully removed this large part of the car.
Gas tank being removed

Following the successful removal, the group started doing some design for the future stages of the car. We designed and sketched where the battery box will go under the trunk. We knew the number of batteries needed and the dimensions of the batteries, so that we could find the dimensions and right placement for it on the supra. The best way we could do this was making two cardboard mock up (one of the box and one of the trunk) so we had sort of an idea of size and design, which was the smart idea and pretty cool since it is a huge part of the transformation to an electric car. Although the mock up take time, especially when cardboard gets wet (for future notice, don't cut cardboard when it is wet), it was the right direction for this design decision. 

Before today we had been considering options for batteries and placement. But I am glad we were able to know what batteries we are going to be using. Then after knowing that, we decided to place it in the spare tire area, where we will make a hole through and use this as the battery box. The mock up of the entire trunk and of the battery box helped with the design process for the group. Having the decision made for the battery box was a relief, now we just have to execute this step successfully.

Moving to another part of the car, we started working on the motors. We utilized the couple (connects shaft of motors together) and the connecting motor mount from a build that Adam had previously done. There were a lot of really big bolts that go into it, so it took time for it to all come together. Overall, I think we had a successful day and we will be back at it tomorrow.